Creating a Sophisticated Chatbot GUI with Python, Thonny, and AI (May 2024)
Creating a Sophisticated Chatbot GUI with Python, Thonny, and AI (May 2024)
This article is brought to you by BeatIpsum.com and JustYourInfo, the project that merges music, AI, and programming to create and educate! Today, we’ll explore how to build a sophisticated chatbot using Python. This chatbot uses various modules like tkinter for the GUI, sqlite3 for database operations, and openai for generating responses based on user input. Let’s dive into setting up your environment, understanding the script, and running the chatbot using Thonny, the friendly Python IDE. We used a mixture of ChatGPT and Good Ole Fashion programming (googling) to create this wonderful project!
Setting Up Your Development Environment
Before running the script, you’ll need to install Python and Thonny. You can download and install Python from python.org and Thonny from thonny.org. Once both are installed, you can set up the necessary libraries and modules for our chatbot.
Installing Required Libraries
1. Open Thonny:
Start Thonny IDE. In the toolbar, you’ll find options like ‘Run’, ‘Shell’, and ‘Tools’.
2. Access the Package Manager:
Go to Tools > Manage packages. This opens the package manager where you can search for and install Python packages. (You Can Also Install Packages Using the Open System Shell Option)

Thonny Tools Menu
3. Install Packages:
In the package manager’s search bar, type each of the following package names and press “Search”. When the package appears, click “Install” to install it.
tkinter (should be included with Python, no need to install separately)
wikipediaapi
requests
sqlite3 (included with Python, no need for separate installation)
openai
python-docx
pdfplumber
Running the Script in Thonny
1. Copy the Script: Copy the entire script provided below.
2. Create a New Python File:
Go to File > New. A new editor window will open.

Paste the copied script into this new file.
3. Save the File:
Go to File > Save and choose a location and filename for your script, such as sophisticated_chatbot.py.
4. Set Up the OpenAI API Key and User Agent:
Replace “ your-openai-api-key-here“ with your actual OpenAI API key. Obtain a key from OpenAI if you don’t have one. (Change Key Often or Change Method To Use a Variable That Hides Your Key)
NOTE: Replace ‘Your Email’ with Your Actual Email.
Line Where Your Email Goes: user_agent = “Sophisticated Chatbot/1.0 (Your:Email)”
5. Run the Script:
Click the Run button (Green Play Button) in Thonny. The GUI of the chatbot should appear or choose “Run Current Script” from the run menu.

Thonny Menu Bar (Click The Green Button)

Thonny ‘Run Current Script’ Option
Conclusion
With these steps, you should be able to run a sophisticated chatbot on your local machine using Thonny.
The Script
Here is the full Python script for the sophisticated chatbot:
import tkinter as tk
from tkinter.scrolledtext import ScrolledText
from tkinter import filedialog, messagebox
from threading import Thread
import wikipediaapi
import requests
import sqlite3
import openai
from docx import Document
import pdfplumber
import os
# OpenAI API Key setup
openai.api_key = “your-openai-api-key-here”
# Declare chat_widget globally
chat_widget = None
class ChatContext:
def __init__(self):
self.last_topic = None
self.reference_documents = []
self.predefined_responses = {
“hello”: “Hello! How can I assist you today?”,
“how are you”: “I’m a chatbot, so I don’t have feelings, but I’m here to help!”,
“who are you”: “I’m a sophisticated chatbot designed to provide information and assistance.”,
“bye”: “Goodbye! Have a great day!”
}
self.previous_answers = {} # Store previous answers in the conversation
def setup_window():
global chat_widget
window = tk.Tk()
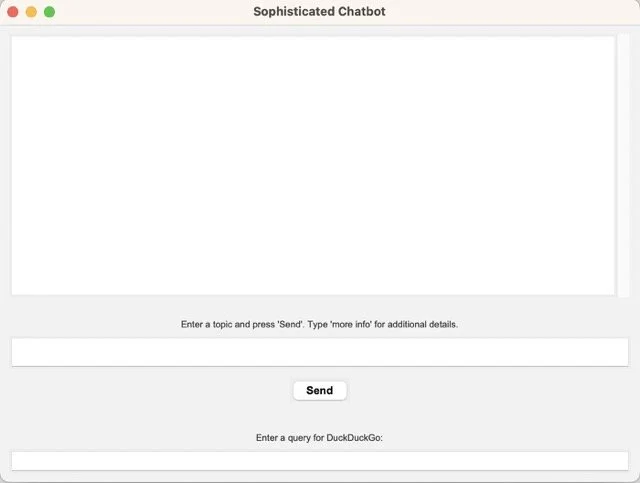
window.title(“Sophisticated Chatbot”)
window.configure(bg=’#f2f2f2')
window.geometry(‘700x500’)
chat_widget = ScrolledText(window, state=’disabled’, width=60, height=20, bg=’#ffffff’, wrap=’word’, font=(‘Arial’, 12))
chat_widget.pack(fill=’both’, expand=True, padx=10, pady=10)
instructions = tk.Label(window, text=”Enter a topic and press ‘Send’. Type ‘more info’ for additional details.”, bg=’#f2f2f2', font=(‘Arial’, 10), fg=’#333333')
instructions.pack(pady=(10, 5))
msg_entry = tk.Entry(window, width=55, bg=’white’, font=(‘Arial’, 12))
msg_entry.pack(pady=(0, 10), padx=10, fill=’x’, ipady=5)
msg_entry.bind(“<KeyRelease>”, lambda event: expand_entry(msg_entry)) # Expand entry as you type
send_button = tk.Button(window, text=”Send”, command=lambda: send_message(msg_entry.get()), bg=’#4CAF50', fg=’#000000', font=(‘Arial’, 12, ‘bold’))
send_button.pack(pady=(0, 10))
setup_duckduckgo_search(window)
window.chat_context = ChatContext()
settings_button = tk.Button(window, text=”Settings”, command=open_settings_window, bg=’#2196F3', fg=’#000000', font=(‘Arial’, 12, ‘bold’))
settings_button.pack(pady=(0, 10))
return window
def open_settings_window():
settings_window = tk.Toplevel()
settings_window.title(“Settings”)
settings_window.configure(bg=’#f2f2f2')
upload_label = tk.Label(settings_window, text=”Upload a document for reference:”, bg=’#f2f2f2', font=(‘Arial’, 10), fg=’#333333')
upload_label.pack(pady=(10, 5))
upload_button = tk.Button(settings_window, text=”Upload”, command=upload_document, bg=’#4CAF50', fg=’#ffffff’, font=(‘Arial’, 10, ‘bold’))
upload_button.pack(pady=(0, 5))
documents_label = tk.Label(settings_window, text=”Uploaded Documents:”, bg=’#f2f2f2', font=(‘Arial’, 10), fg=’#333333')
documents_label.pack(pady=(10, 5))
documents_listbox = tk.Listbox(settings_window, width=50, height=10, bg=’white’, font=(‘Arial’, 10))
documents_listbox.pack(pady=(0, 5))
documents = get_all_documents()
for doc in documents:
documents_listbox.insert(tk.END, doc[0])
delete_button = tk.Button(settings_window, text=”Delete”, command=lambda: delete_document(documents_listbox), bg=’#FF5722', fg=’#ffffff’, font=(‘Arial’, 10, ‘bold’))
delete_button.pack(pady=(0, 10))
def create_documents_table():
conn = sqlite3.connect(‘documents.db’)
cursor = conn.cursor()
cursor.execute(‘’’CREATE TABLE IF NOT EXISTS documents
(id INTEGER PRIMARY KEY, content TEXT)’’’)
conn.commit()
conn.close()
def insert_document(content):
conn = sqlite3.connect(‘documents.db’)
cursor = conn.cursor()
cursor.execute(“INSERT INTO documents (content) VALUES (?)”, (content,))
conn.commit()
conn.close()
def get_all_documents():
conn = sqlite3.connect(‘documents.db’)
cursor = conn.cursor()
cursor.execute(“SELECT content FROM documents”)
documents = cursor.fetchall()
conn.close()
return documents
def upload_document():
file_path = filedialog.askopenfilename()
if file_path:
file_extension = os.path.splitext(file_path)[1].lower()
content = “”
if file_extension == ‘.docx’:
content = read_docx(file_path)
elif file_extension == ‘.pdf’:
content = read_pdf(file_path)
elif file_extension in [‘.txt’, ‘.text’]:
with open(file_path, ‘r’, encoding=’utf-8', errors=’ignore’) as file:
content = file.read()
else:
messagebox.showerror(“Error”, “Unsupported file type”)
return
insert_document(content)
messagebox.showinfo(“Success”, “Document uploaded successfully”)
def read_docx(file_path):
doc = Document(file_path)
full_text = []
for para in doc.paragraphs:
full_text.append(para.text)
return ‘\n’.join(full_text)
def read_pdf(file_path):
with pdfplumber.open(file_path) as pdf:
full_text = []
for page in pdf.pages:
full_text.append(page.extract_text())
return ‘\n’.join(filter(None, full_text)) # filter to remove None in case of empty pages
def setup_duckduckgo_search(window):
search_label = tk.Label(window, text=”Enter a query for DuckDuckGo:”, bg=’#f2f2f2', font=(‘Arial’, 10), fg=’#333333')
search_label.pack(pady=(20, 5))
search_entry = tk.Entry(window, width=55, bg=’white’, font=(‘Arial’, 12))
search_entry.pack(pady=(0, 10), padx=10, fill=’x’, ipady=5)
search_button = tk.Button(window, text=”Search”, command=lambda: open_duckduckgo_window(search_entry.get()), bg=’#4CAF50', fg=’#000000', font=(‘Arial’, 12, ‘bold’))
search_button.pack(pady=(0, 10))
def send_message(message):
global chat_widget
if message.strip():
display_message(f”You: {message}\n”)
response = get_predefined_response(message.lower())
if response:
display_message(f”Bot: {response}\n”)
else:
if message.lower() == “more info”:
if chat_widget.winfo_toplevel().chat_context.last_topic:
message = chat_widget.winfo_toplevel().chat_context.last_topic
fetch_more_info(message)
else:
display_message(“Bot: Please specify a topic first.\n”)
else:
response_thread = Thread(target=generate_and_display_response, args=(message,))
response_thread.start()
def display_message(message):
global chat_widget
chat_widget.config(state=’normal’)
chat_widget.insert(tk.END, message)
chat_widget.config(state=’disabled’)
chat_widget.see(tk.END)
def generate_and_display_response(user_input):
global chat_widget
response = fetch_wikipedia_summary(user_input)
if “No Wikipedia page matches this query.” in response or “Please be more specific.” in response:
response = get_openai_response(user_input) # Fallback to OpenAI if Wikipedia is insufficient
else:
chat_widget.winfo_toplevel().chat_context.last_topic = user_input
chat_widget.winfo_toplevel().chat_context.previous_answers[user_input] = response # Remember previous answers
display_message(f”Bot: {response}\n”)
def get_predefined_response(message):
predefined_responses = chat_widget.winfo_toplevel().chat_context.predefined_responses
return predefined_responses.get(message)
def fetch_wikipedia_summary(query):
user_agent = “Sophisticated Chatbot/1.0 (Your: Email)”
wiki_wiki = wikipediaapi.Wikipedia(language=’en’, user_agent=user_agent)
page = wiki_wiki.page(query)
if page.exists():
return page.summary
else:
return “No Wikipedia page matches this query.”
def fetch_more_info(query):
response = fetch_duckduckgo_response(query)
display_message(f”DuckDuckGo: {response}\n”)
def fetch_duckduckgo_response(query):
url = “https://api.duckduckgo.com/"
params = {‘q’: query, ‘format’: ‘json’, ‘no_html’: 1}
response = requests.get(url, params=params)
data = response.json()
abstract_text = data.get(‘AbstractText’, “”)
if not abstract_text:
if ‘RelatedTopics’ in data and data[‘RelatedTopics’]:
abstract_text = data[‘RelatedTopics’][0].get(‘Text’, ‘No related topics available.’)
elif ‘AbstractURL’ in data:
abstract_text = f”More information at: {data[‘AbstractURL’]}”
else:
abstract_text = “No additional info found on DuckDuckGo.”
return abstract_text
def get_openai_response(query):
try:
response = openai.ChatCompletion.create(
model=”gpt-3.5-turbo”,
messages=[{“role”: “system”, “content”: “You are a helpful and kind AI Assistant.”},
{“role”: “user”, “content”: query}]
)
return response.choices[0].message[‘content’]
except Exception as e:
return f”Error interacting with AI: {str(e)}”
def open_duckduckgo_window(query):
new_window = tk.Toplevel()
new_window.title(“DuckDuckGo Search Result”)
new_window.configure(bg=’#f2f2f2')
response = fetch_duckduckgo_response(query)
result_label = tk.Label(new_window, text=response, wraplength=400, justify=”left”, bg=’white’, font=(‘Arial’, 12))
result_label.pack(padx=10, pady=10)
copy_button = tk.Button(new_window, text=”Copy”, command=lambda: new_window.clipboard_clear() or new_window.clipboard_append(response), bg=’#4CAF50', fg=’#ffffff’, font=(‘Arial’, 10, ‘bold’))
copy_button.pack(pady=(0, 10))
def delete_document(documents_listbox):
selected_index = documents_listbox.curselection()
if selected_index:
document = documents_listbox.get(selected_index)
delete_document_by_content(document)
documents_listbox.delete(selected_index)
def delete_document_by_content(content):
conn = sqlite3.connect(‘documents.db’)
cursor = conn.cursor()
cursor.execute(“DELETE FROM documents WHERE content=?”, (content,))
conn.commit()
conn.close()
def expand_entry(entry):
entry.config(width=len(entry.get()) + 5) # Expand entry dynamically as you type
def main():
create_documents_table()
setup_window().mainloop()
if __name__ == “__main__”:
main()